Connect & set up
Prerequisites
- Sensor with power supply and Ethernet cable
- Windows PC with administrator rights
- Chrome, Edge, or Firefox
Direct Ethernet connection
- Connect the sensor directly to the PC with Ethernet and power on the sensor.
- Configure the PC Ethernet adapter with a static address on the sensor subnet:
Use 192.168.0.1 for the sensor and 192.168.0.100 for the PC. Set the subnet mask to 255.255.255.0 on both devices, and leave the PC gateway empty.
On Windows, open Settings → Network & internet → Ethernet → IP assignment → Edit, select Manual, enable IPv4, and enter the PC values:
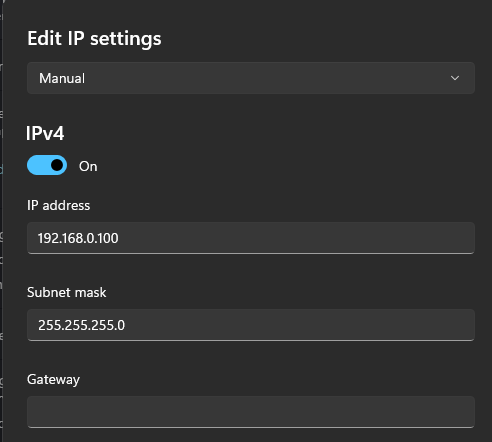
Example Windows configuration for a direct Ethernet connection.
Device discovery
Use SOPAS ET to find the sensor in the network with broadcasting.
Open SOPASair and log in
Open http://<sensor-ip>/ in a browser. With the factory example, use http://192.168.0.1/.
The Home page displays the device identity, connection status, and firmware version. To change settings, select the user icon in the top-right corner, choose the required user level, and enter its password. The Service level provides full configuration access; viewing status does not require login.
Check the firmware
Check the displayed firmware version before configuring the sensor. Use the matching release notes and firmware package for that version and device variant. For automated checks, read GET /api/DeviceIdent or GET /api/FirmwareVersion through the REST API.
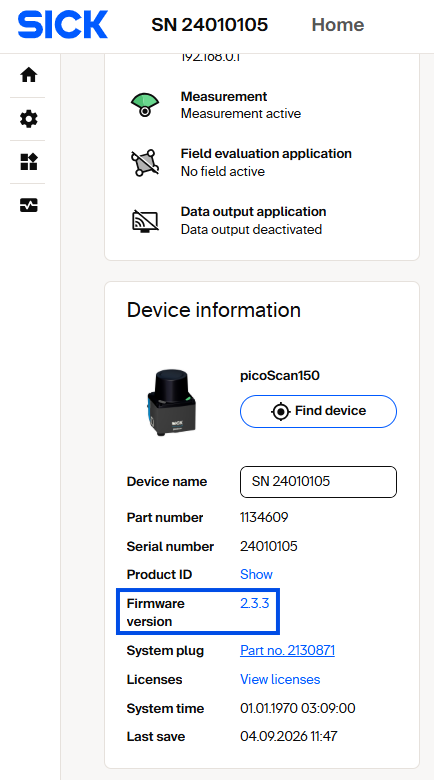
Firmware version in the Home page device information.