Classify Hex Nuts / Screws
Short Description
This guided project introduces the AI Classification tool in SICK Nova.
You will train a simple AI model to distinguish between different hex nuts and screws using images captured with the Vision Starter Kit.
Project Information
| Project type | Required knowledge level | Estimated duration | Additional hardware and software requirements |
|---|---|---|---|
| Guided Project | Basic | 30 Minutes | None – everything is included in the Starter Kit |
Goal
The goal of this project is to create a simple AI Classification task that can distinguish between different hex nuts and screws.
After completing this project, you should be able to:
- create an empty job in SICK Nova
- configure image acquisition settings
- add an AI Classification tool
- create image classes
- capture training images
- train an AI Classification model
- test and improve the classification result
Before You Start
Set up the Vision Starter Kit as described in the Getting started section.
Setup tip
Adjust the height of the mounting bracket if necessary.
For this project, a distance of approximately 10 cm between the object and the sensor can help to get a clearer image.
Instructions
Follow the steps below to create your first AI Classification task.
1. Create an Empty Job and Configure Image Acquisition
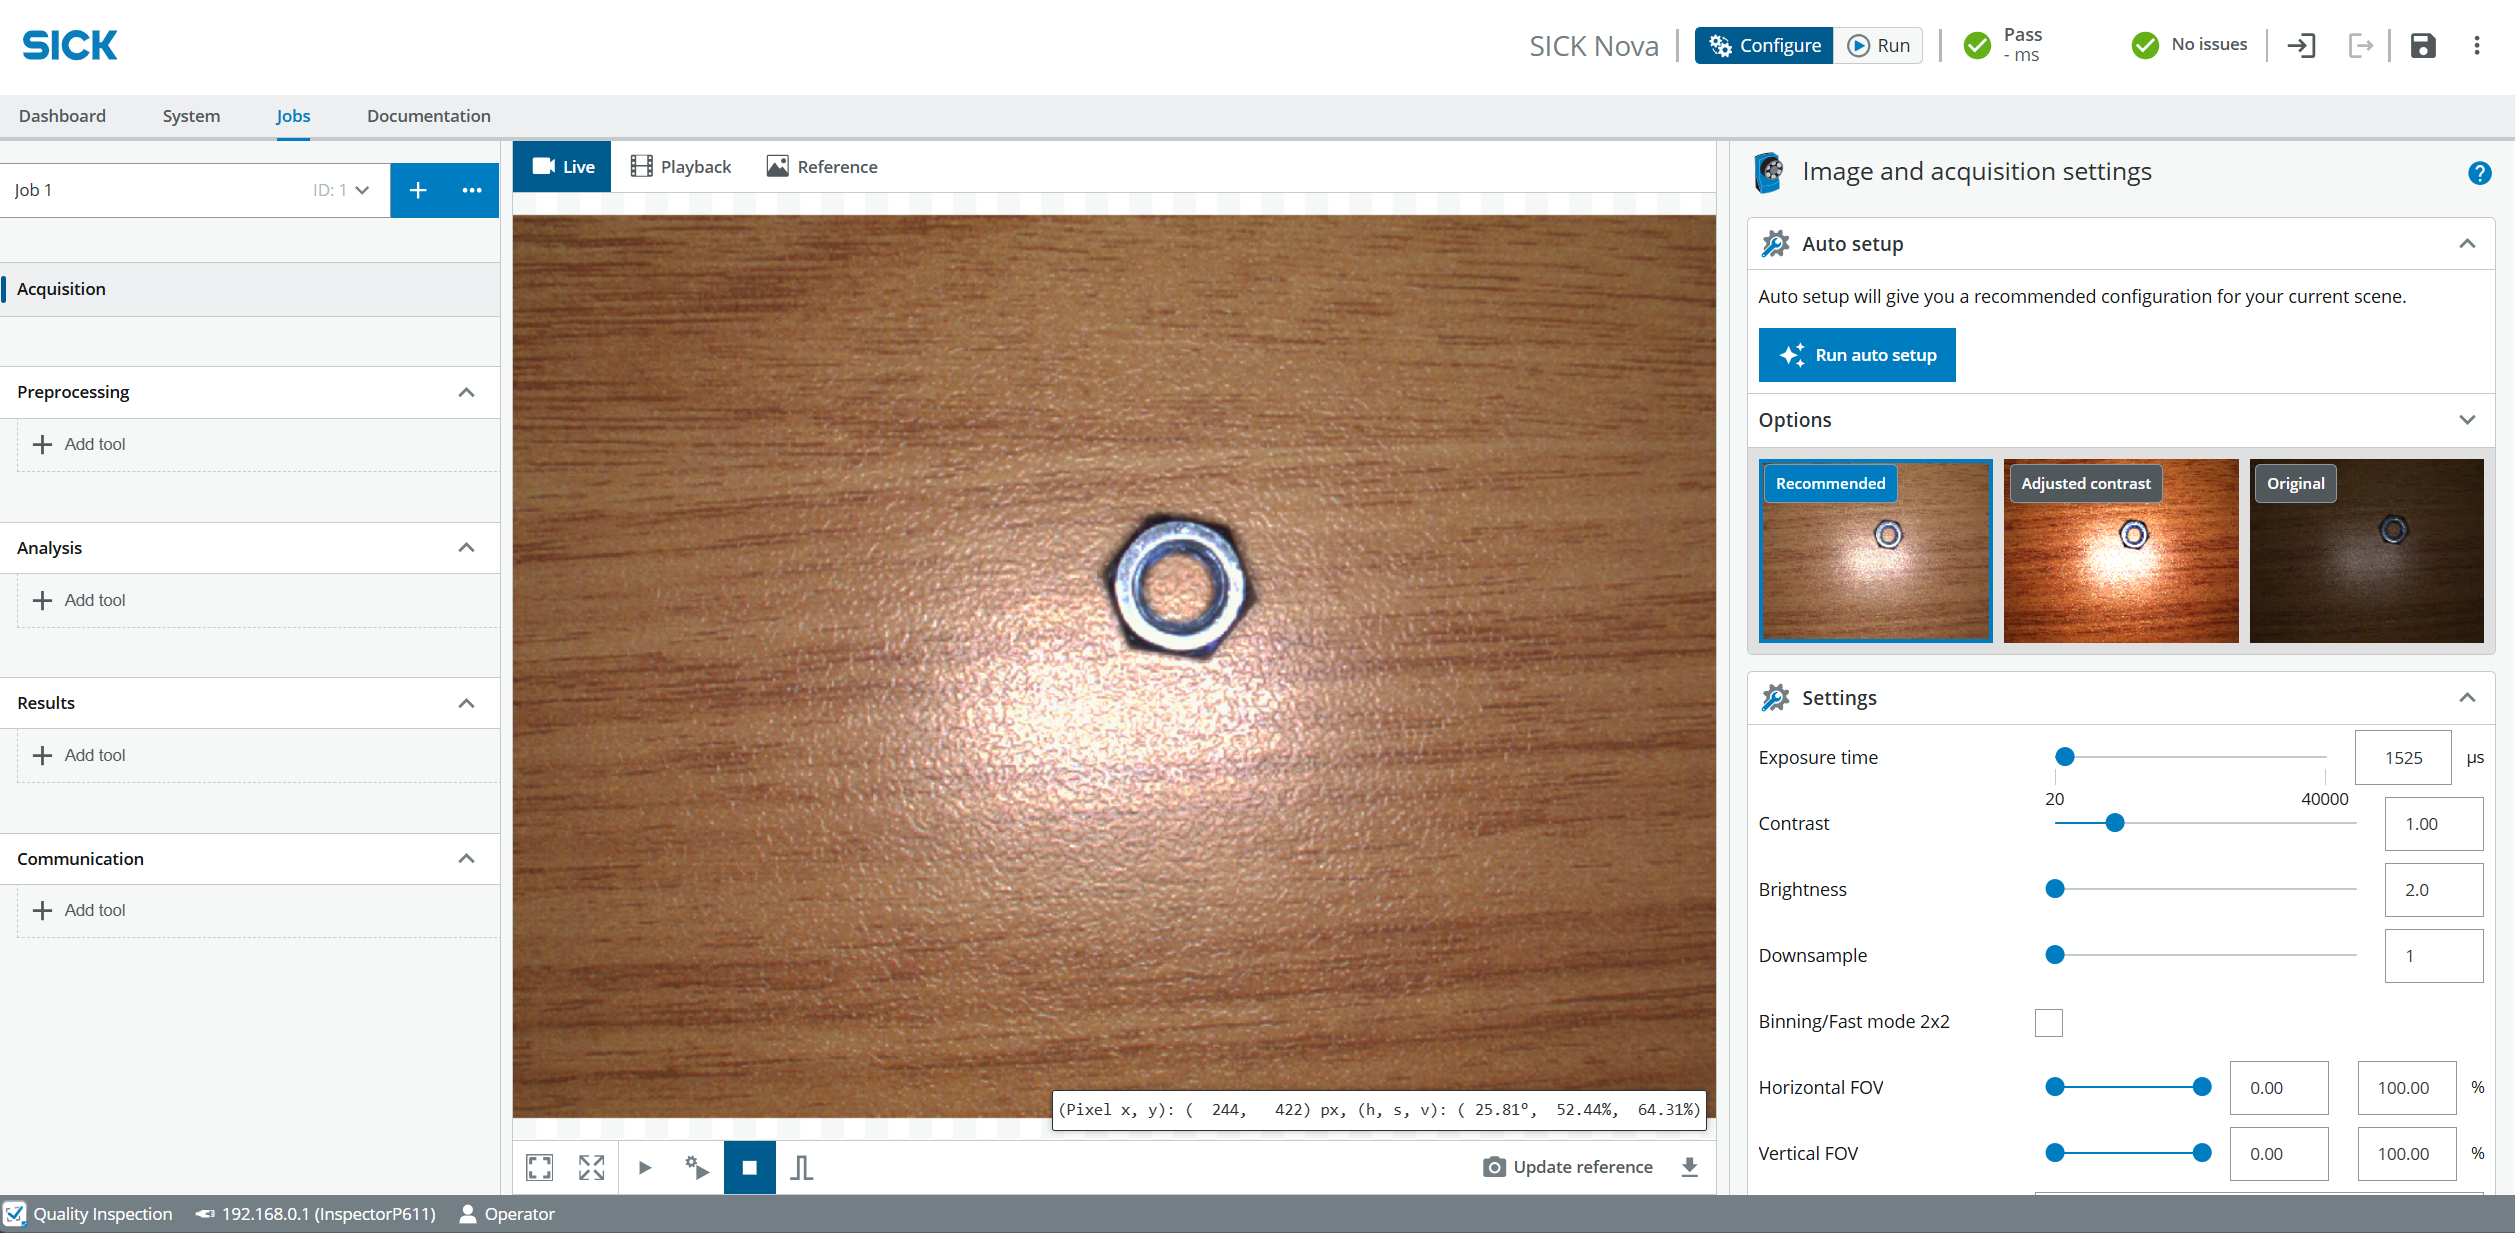
- Create an Empty Job.
- Make sure that Jobs and Acquisition are selected.
- Place the Hex Nut in the sensor's field of view.
- Select Configure.
- Click Run auto setup.
- Adjust the focus with the focus adjustment tool if necessary.
- Click Recommended.
- Click Run to see the live images.
- Adjust the field of view (FOV) and Downsample settings if useful.
2. Add the AI Classification Tool
- In the Analysis section, click Add tool.
- Select Classify > AI Classification.
3. Capture Images for the First Class
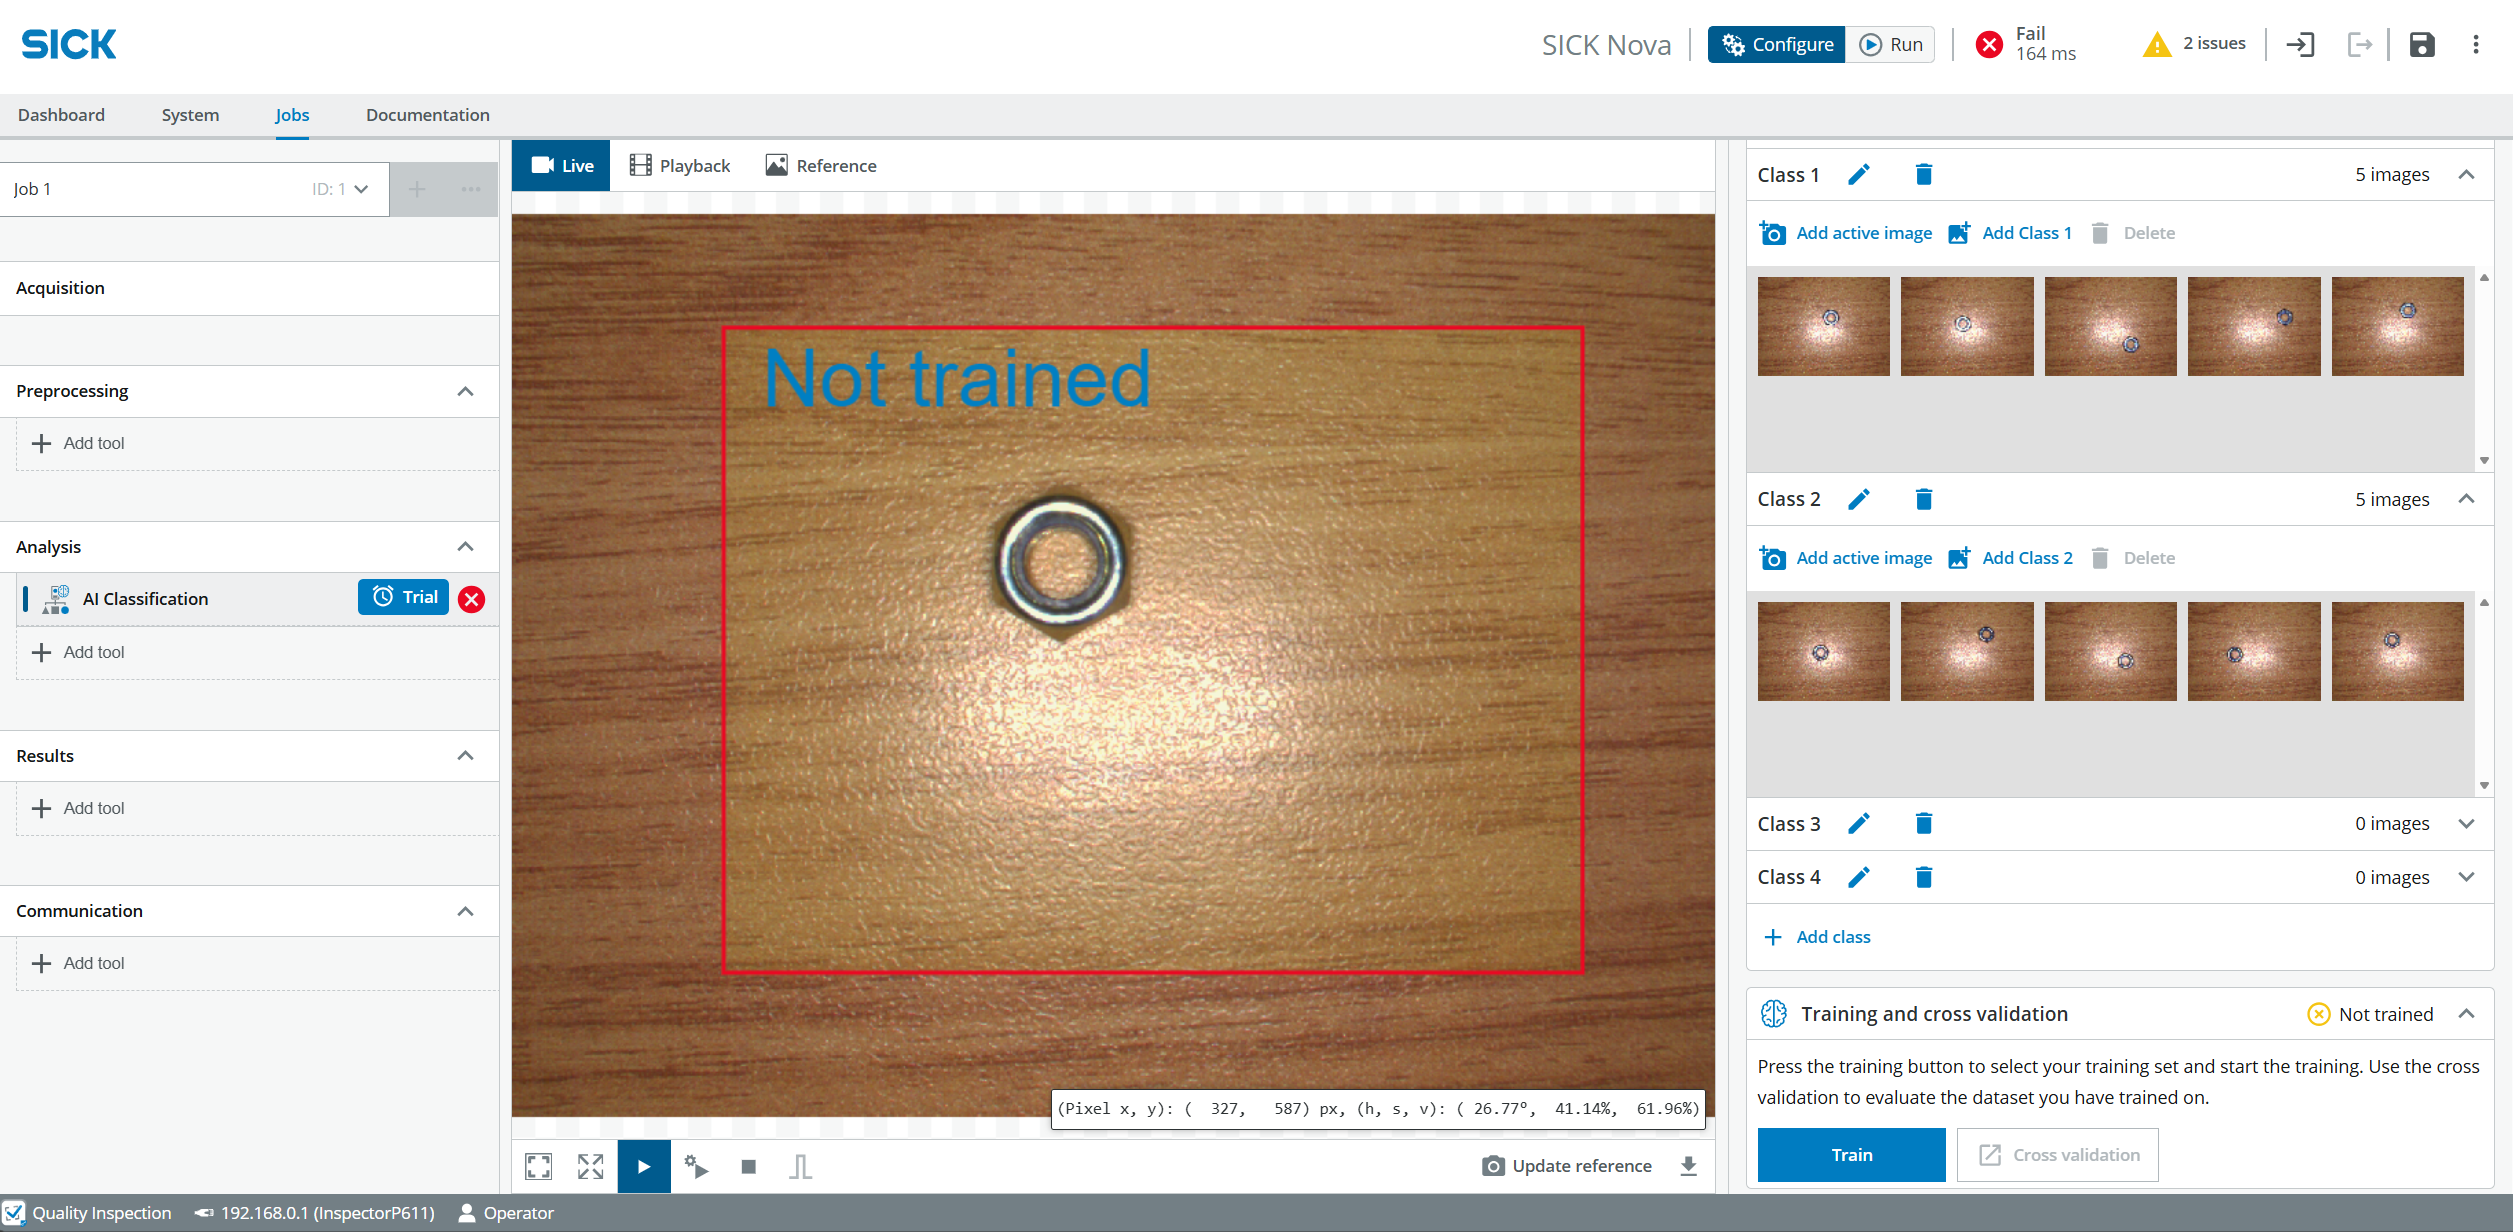
- Make sure Hex Nut 1 is in the sensor's field of view.
- Adjust the size of the red rectangle so that it encloses the object.
- Open Class 1.
- Click Add active image.
- Repeat this step several times.
- Use a new identical object or move the object slightly each time.
Training tip
Try to capture small variations in object position and rotation.
This helps the AI model classify the object more reliably.
4. Capture Images for the Second Class
- Place Hex Nut 2 in the sensor's field of view.
- Open Class 2.
- Click Add active image.
- Repeat this step several times.
- Again, use different positions or rotations to improve the training data.
5. Train and Test the Classification
- Click Train.
- Wait until the job is successfully trained.
- Test whether the objects are detected reliably.
- Add more training images if the result is not stable enough.
Improving the result
If the classification is unreliable, add more images with different positions, rotations and lighting conditions.
A higher variety of training images can improve the classification result.
Expected Result
After completing this project, the Vision Starter Kit should be able to distinguish between the trained object classes.
The AI Classification tool should classify the selected hex nuts or screws based on the images captured during training.
Summary
In this guided project, you created a basic AI Classification task with the Vision Starter Kit.
You learned how to:
- configure image acquisition
- create object classes
- capture training images
- train an AI Classification model
- test and improve the classification result
This project is a good next step after the Vision Starter Project and provides a simple introduction to AI-based image classification.
Next Steps
Continue with another Vision project or open the complete project files on GitHub.com.