Getting Started with the LiDAR Starter Kit
Follow these steps to set up and start using your LiDAR Starter Kit:
Step 1: Hardware Setup
- Connect the LiDAR sensor to your computer using the provided cable and the network adapter.
- Ensure the power supply is connected and turned on.
- Configure the IP address of the adapter.
Detailed instructions
- Shortcut in Windows: "Win + R": "ncpa.cpl"
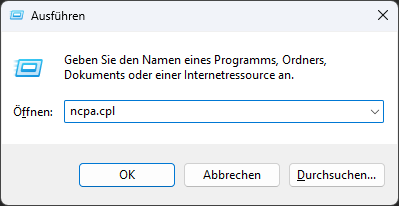
-
Alternative: Open your operating system's network settings (e.g., Control Panel > Network & Internet in Windows 10/11, or the equivalent in your OS).
Choose Advanced network settings -
Identify the USB Ethernet adapter (might be listed as ASIX USB to Gigabit Ethernet Family Adapter).
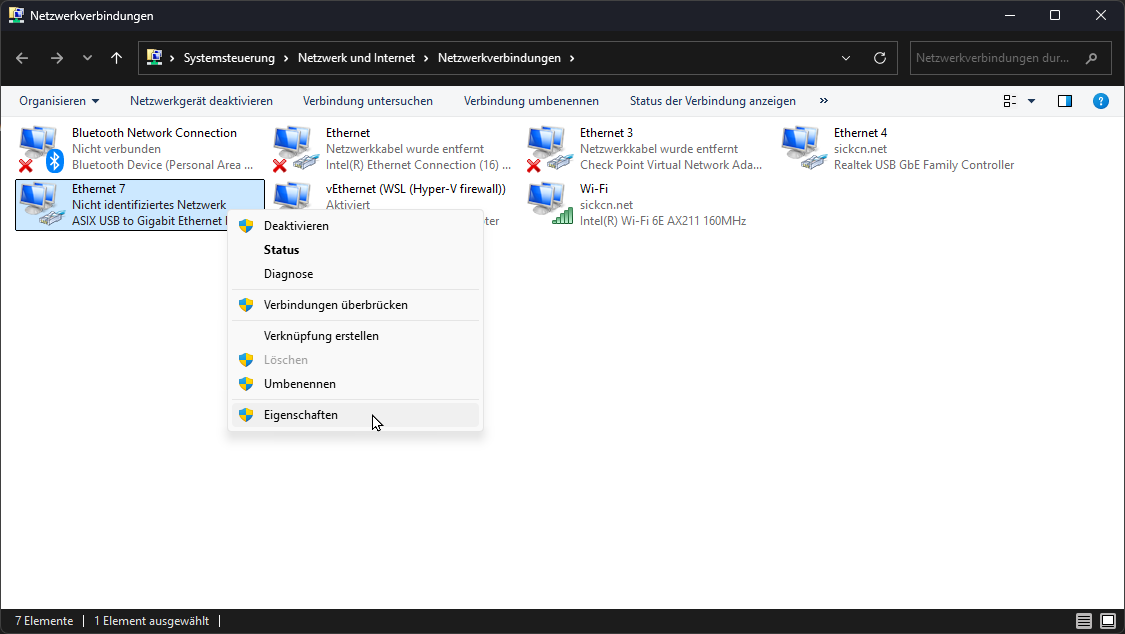
-
Click on the adapter and select Properties / Edit.
-
Enter administrator credentials if necessary.
-
Locate Internet Protocol Version 4 (TCP/IPv4) and select Properties or right-click.
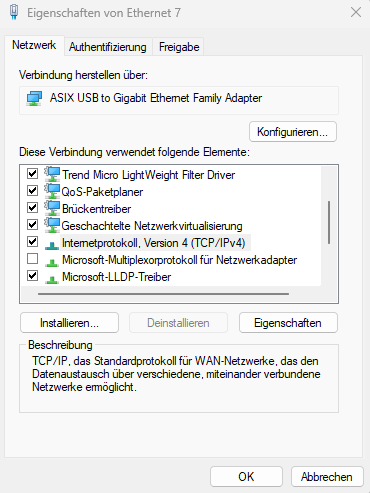
- Change from DHCP to manual IP settings:
Use the following IP address:192.168.0.xxx
Subnet mask:255.255.0.0
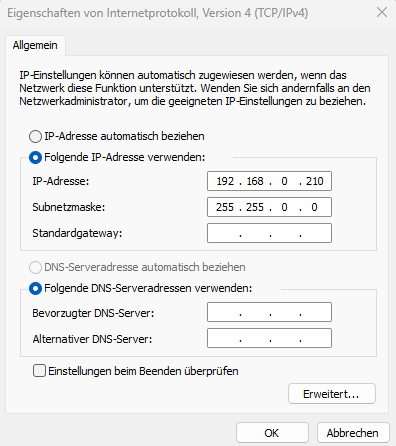
- Save changes by clicking Ok in both windows.
- Open a browser and enter the default IP address 192.168.0.1. You should now see the Sensor UI
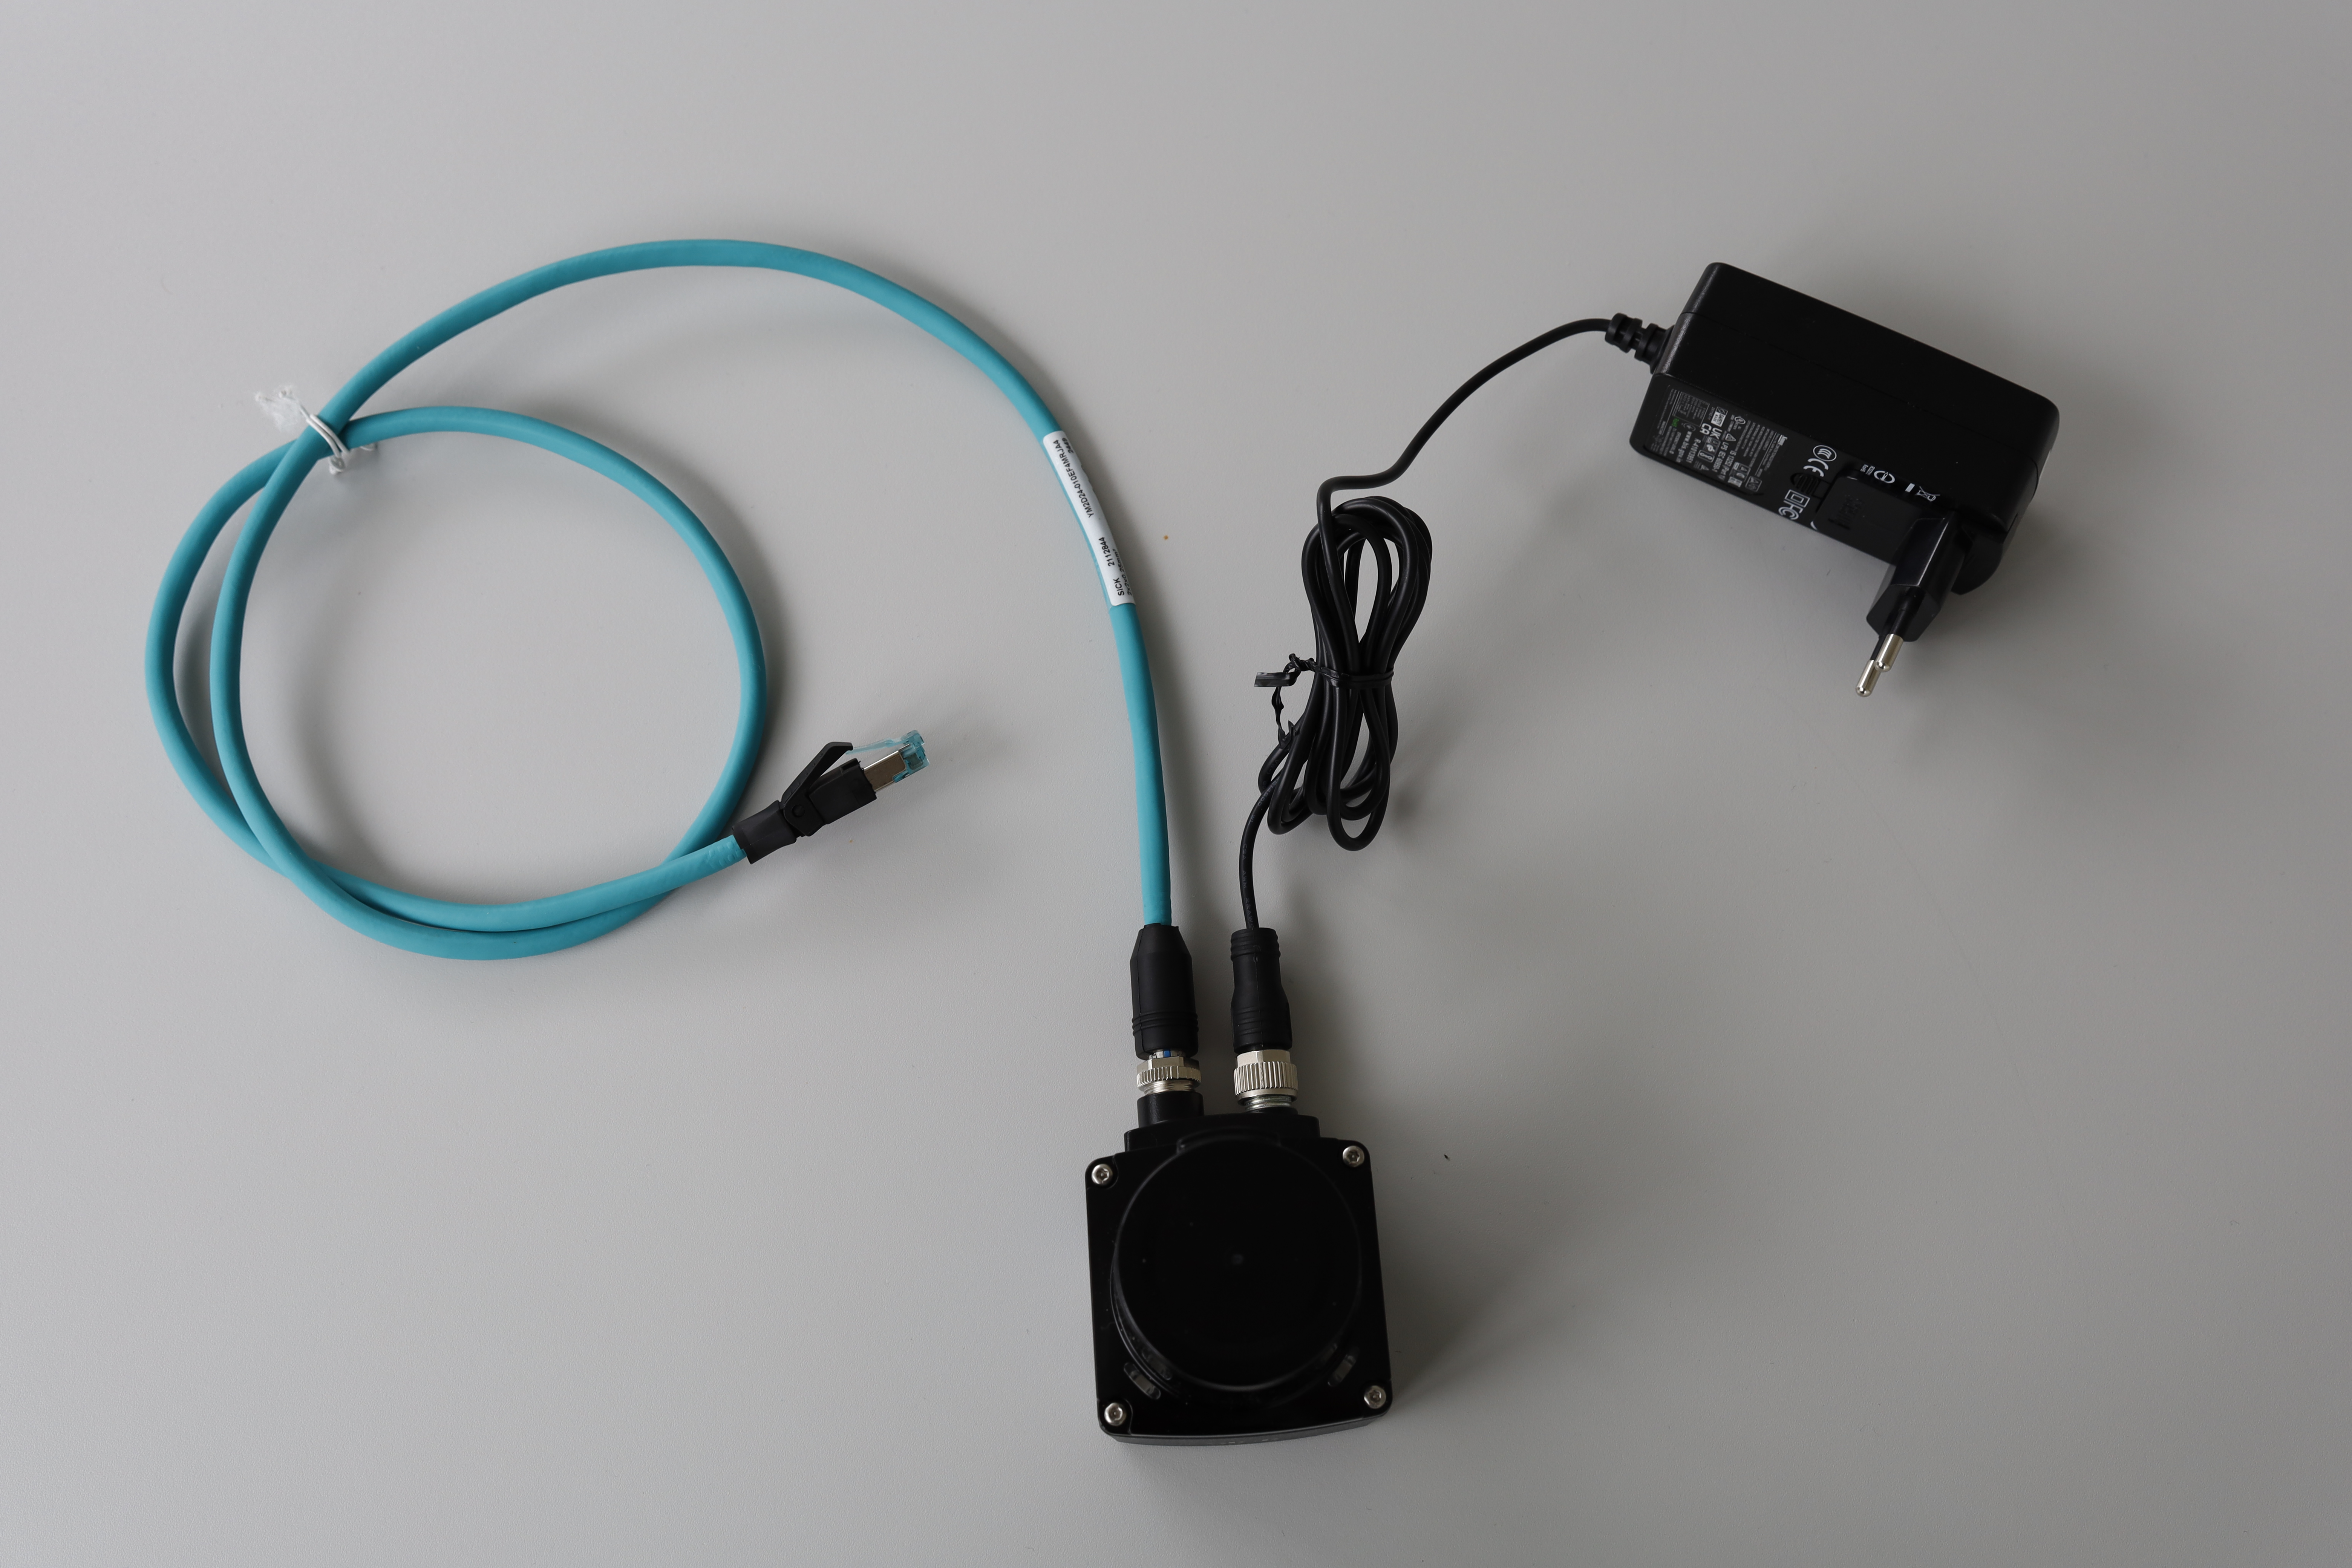
Figure 1: Connection setup for the LiDAR Starter Kit.
Step 2: Software Installation
For the first setup, no additional software installation is required if you only want to open the sensor user interface in your browser.
For more advanced use cases, such as reading measurement data with Python scripts, you can use the example scripts provided in the project repository.
Typical tools you may need later:
- Python
- Visual Studio Code or another IDE
- Example scripts for LiDAR communication
- Optional: GitHub.com project files
Software setup
The basic setup can be completed through the sensor user interface.
Python scripts are mainly required for advanced examples and custom applications.
Step 3: First Measurement
After the LiDAR sensor is connected and reachable, you can start with your first measurement or first demo.
You can either:
- use the sensor user interface to check whether the sensor is reachable
- continue with the first LiDAR example project
- use Python scripts to read device or measurement data
Next Steps
Get started with your first LiDAR project:
Or choose another option: