Classify Hex Nuts / Screws
| Short description | Required knowledge level | Estimated duration | Additional hardware and software requirements |
|---|---|---|---|
| Try out the AI Classification tool by taking images of different hex nuts and/or screws to generate your first AI algorithm. | Basic | 30 Minutes | none – everything included in the Starter Kit |
Setup the sensor as mentioned in the Getting started section
- Create an Empty Job and make sure that Jobs and Acquisition is selected
- Place the Hex Nut in the sensor’s field of view. It is recommended to adjust the height of the mounting bracket to get closer to the object (~ 10 cm from the ground)
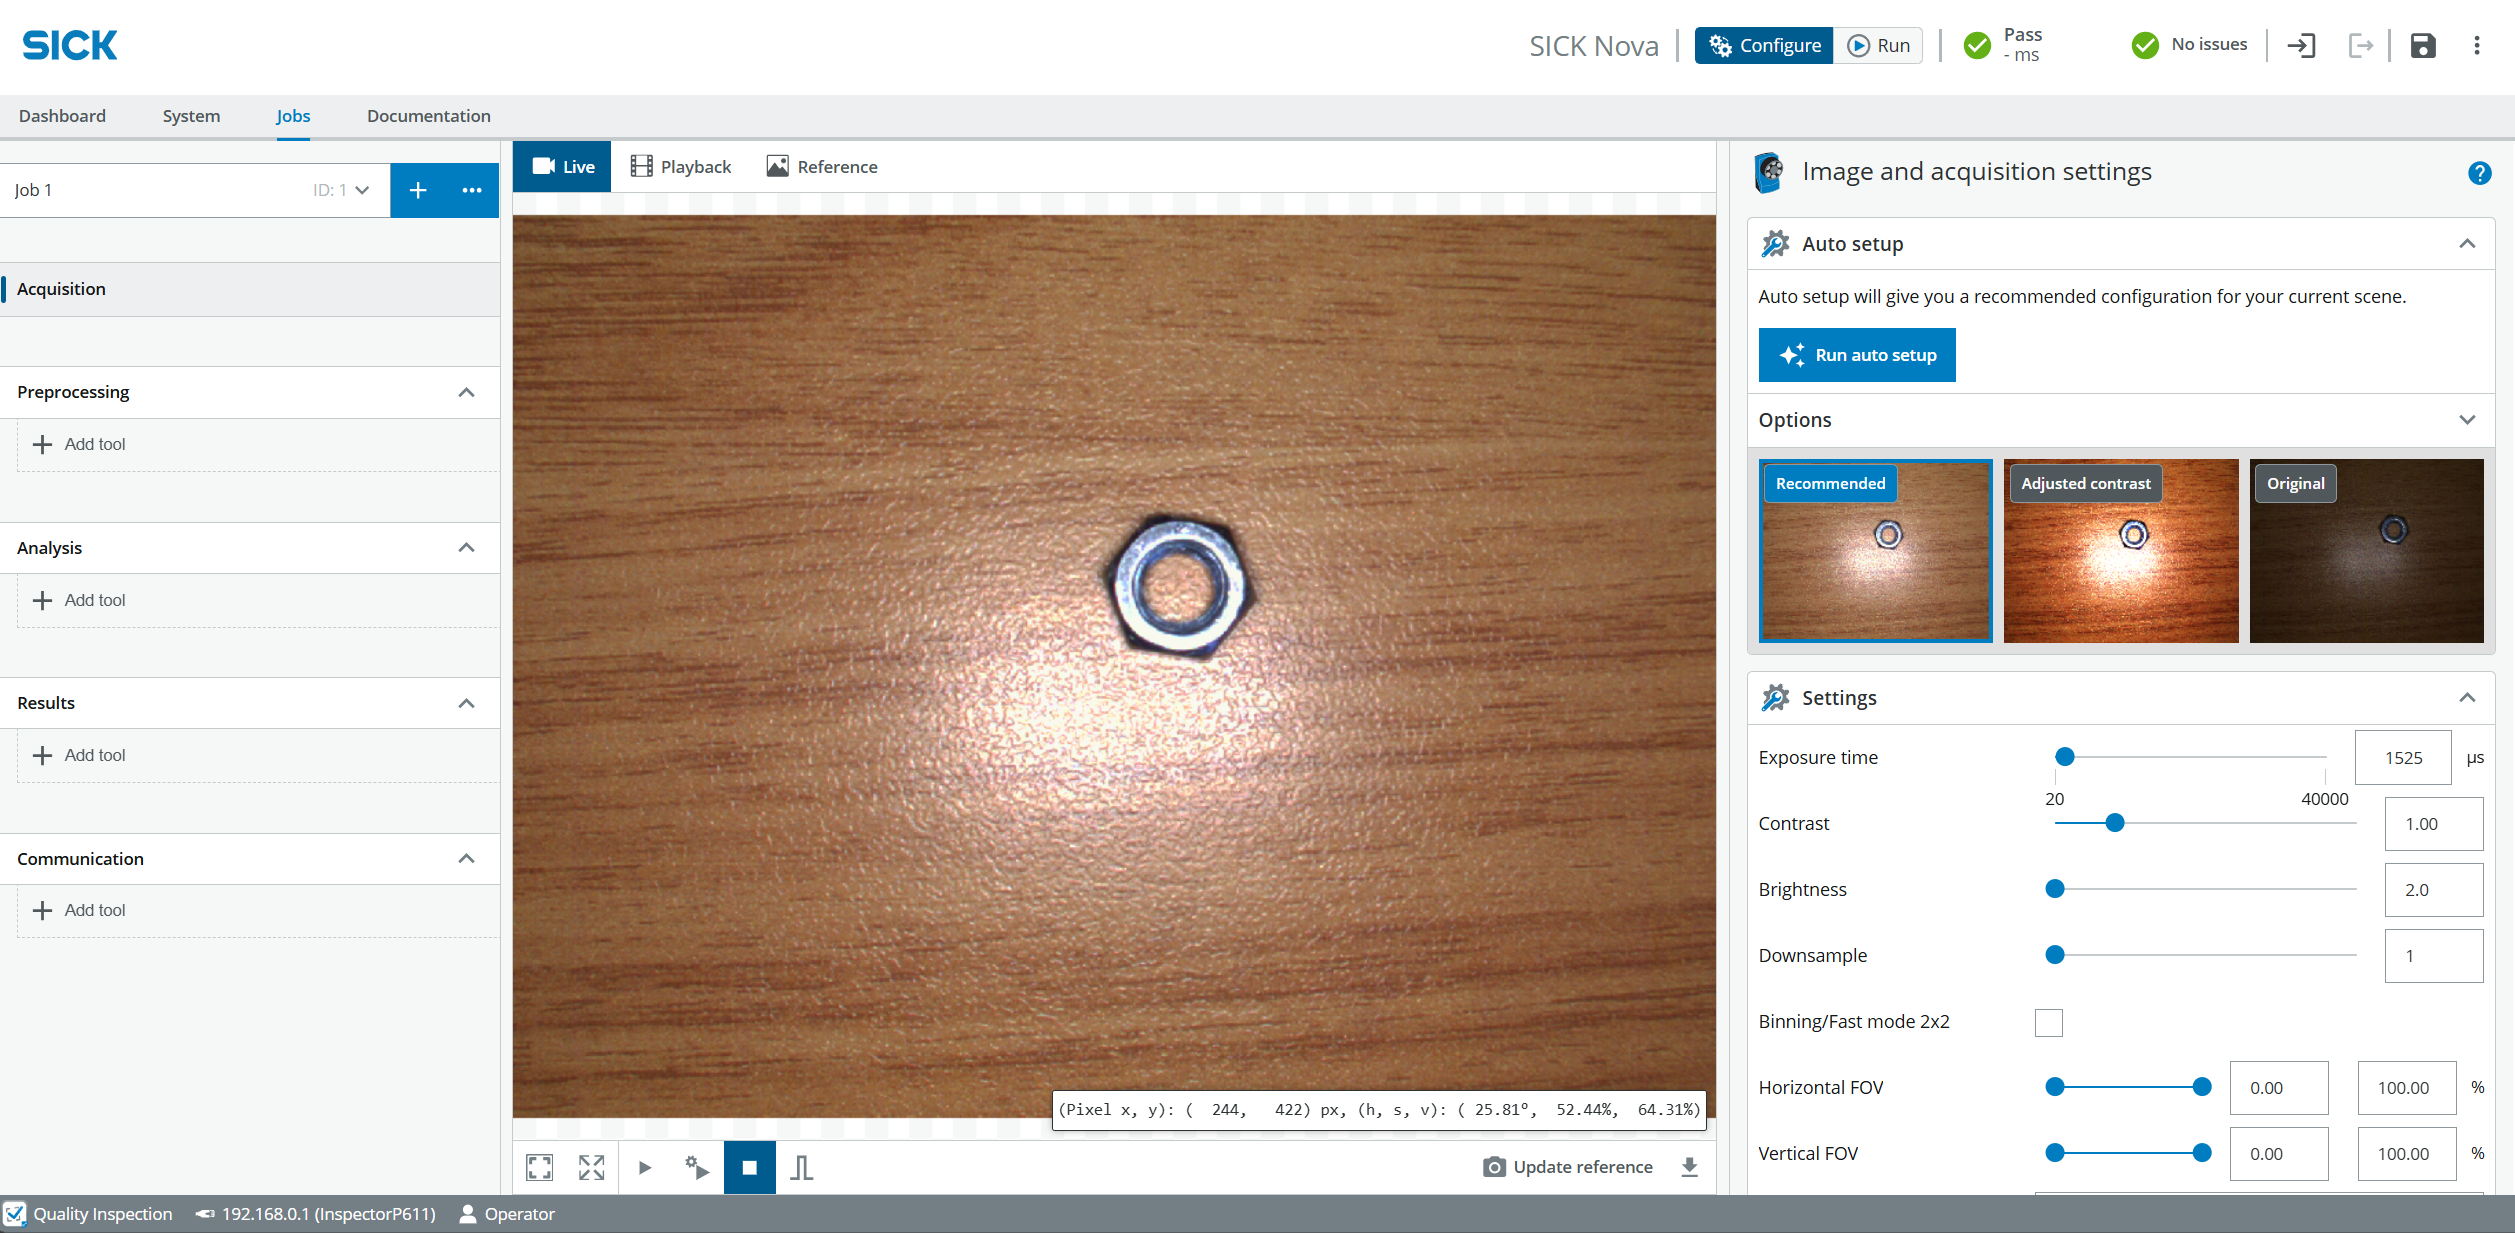
- Select Configure
- Click on Run auto setup. Adjust the focus with the adjustment tool if necessary
- Click Recommended.
- Click Run to see the live images
- Adjust the field of view (FOV) and Downsample if useful
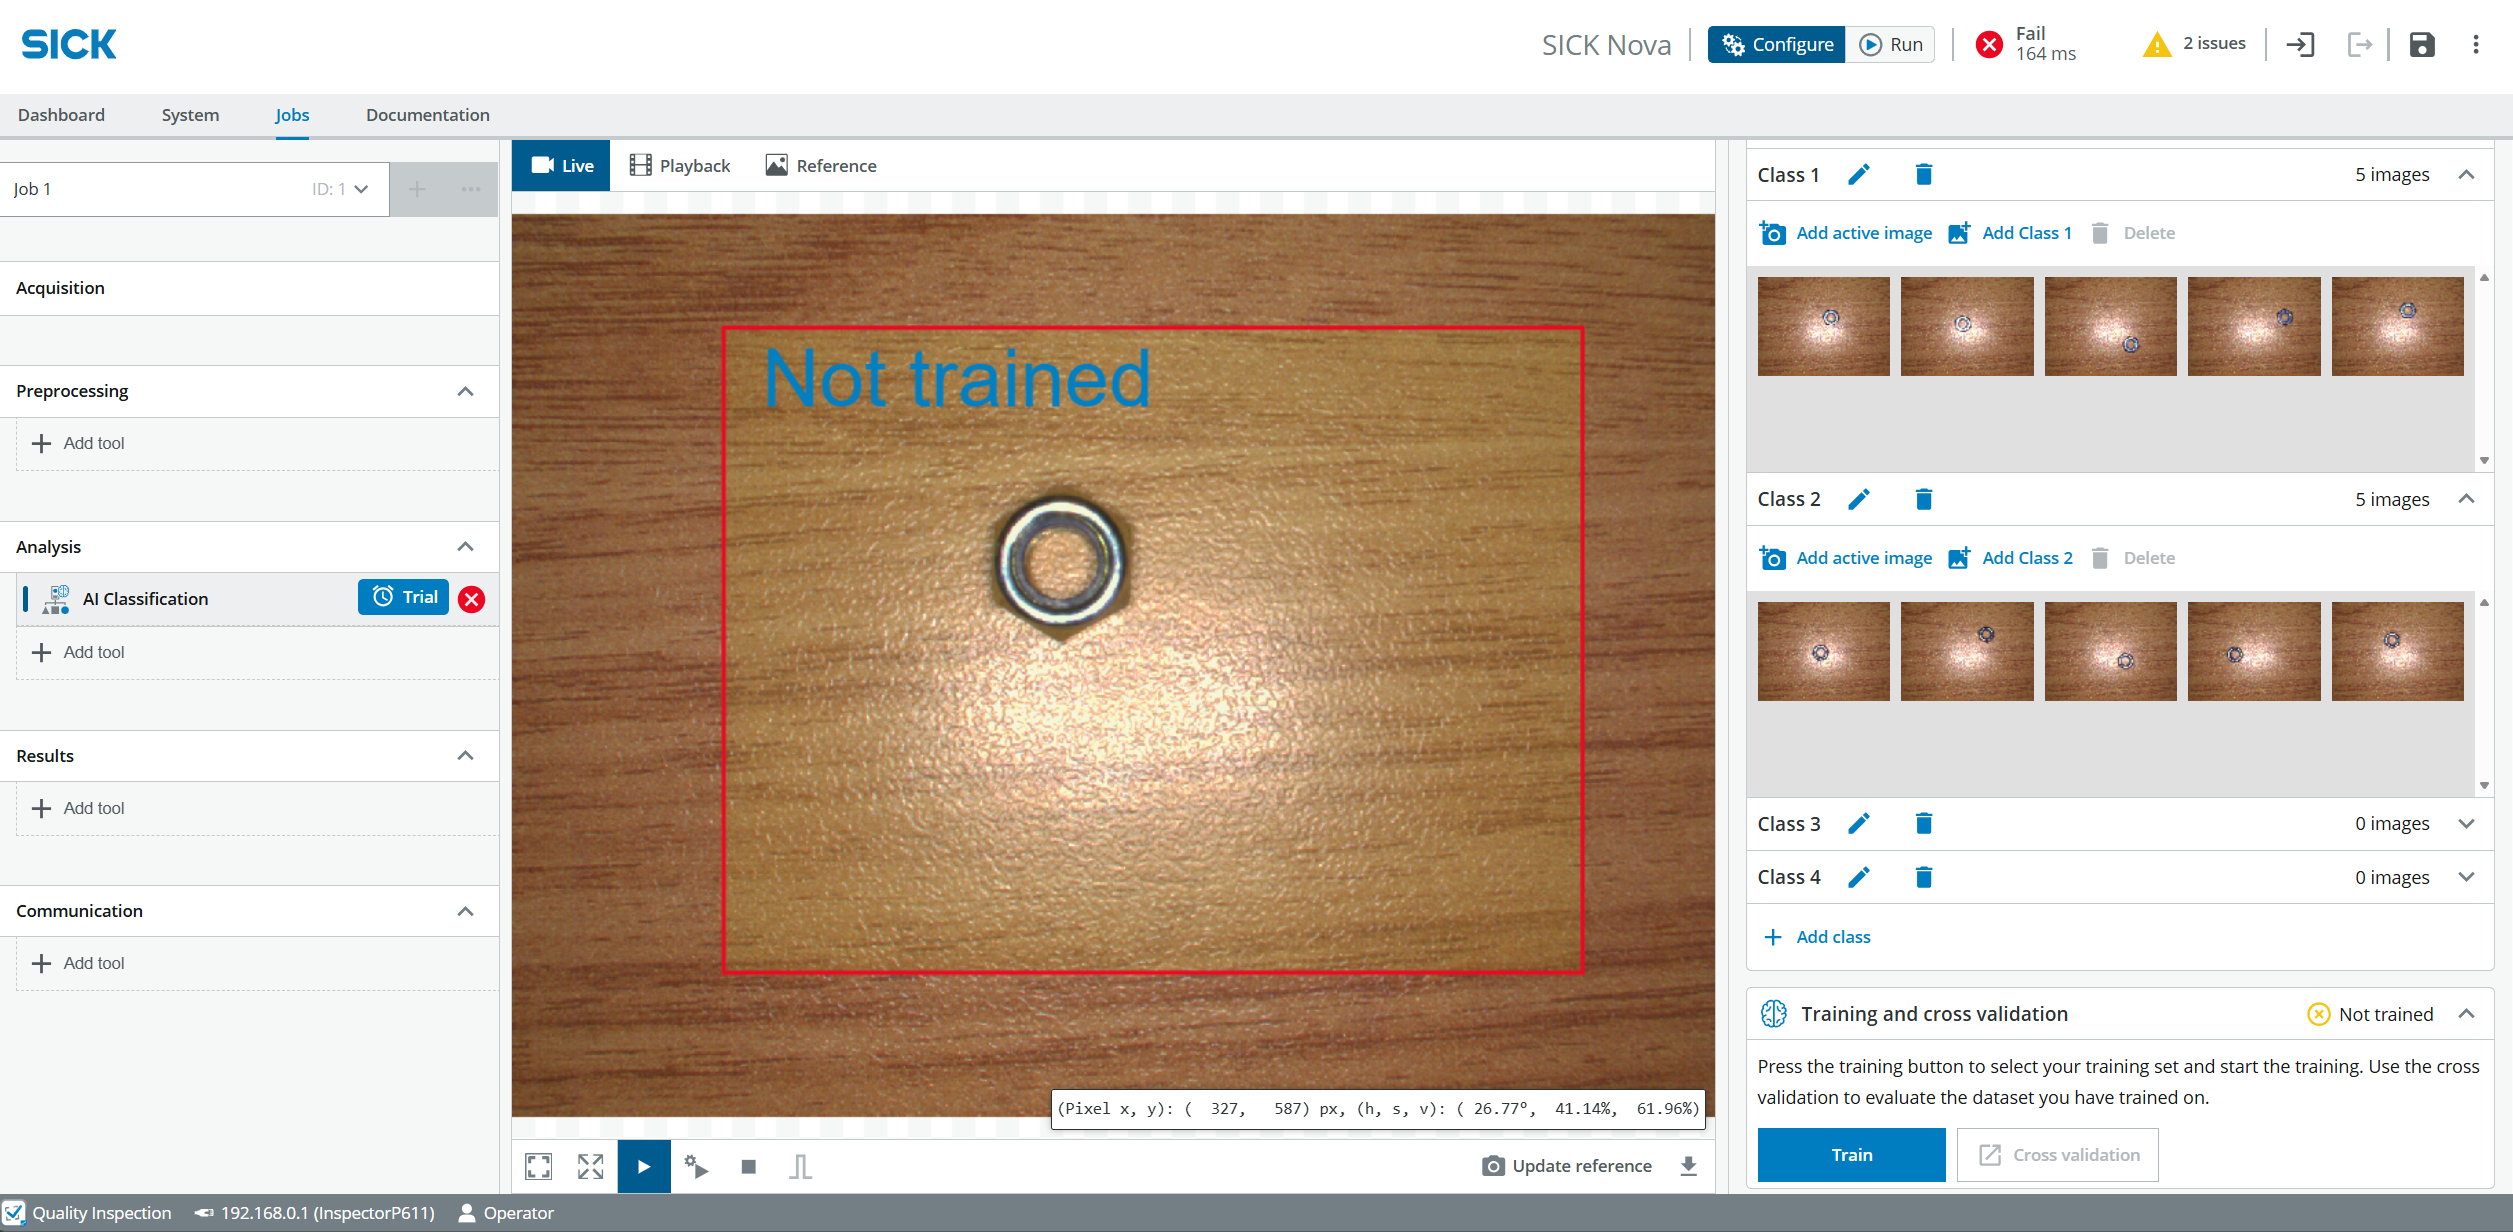
- Click Add tool under the Analysis section and choose Classify > AI Classification
- Make sure the Hex Nut 1 is in the sensor’s FOV. Adjust the size of the red rectangle to enclose the object
- Open Class 1.
- Click on Add active image, repeat this step several times with a new identical object or move the object each time
- Place a Hex Nut 2 in the sensor’s field of view and open Class 2
- Click on Add active image, repeat this step several times with a new identical object or move the object each time
- Click Train and wait until the Job is Successfully trained
- Test if the object is detected reliably. Add more training images to improve the results